Step-by-Step Guide to Installing Sngine on Any Server

Installing Sngine, the ultimate social networking platform script, is a straightforward process when you follow the right steps. This guide ensures that you not only install Sngine but also optimize it for performance and scalability. Let’s dive into the comprehensive guide to installing Sngine on your server, covering everything from prerequisites to troubleshooting common issues.
1. Understanding Sngine: A Quick Overview
Sngine is a PHP-based social networking platform designed to help developers and businesses create their social network websites. It offers features like timelines, user profiles, groups, pages, events, and more. Whether you’re a startup, a hobbyist, or a business aiming to foster a community, Sngine is a cost-effective, reliable solution.
Before proceeding with the installation, understanding Sngine’s architecture will help you navigate the setup process better. Sngine relies on:
- PHP scripts for the backend.
- MySQL database for storing user data, posts, and interactions.
- AJAX and jQuery for smooth interactions.
2. Prerequisites for Installing Sngine
To ensure a smooth installation, make sure you have the following in place:
a. Server Requirements
-
PHP Version: 7.4 or higher (compatible with PHP 8).
-
Database: MySQL 5.0+ or MariaDB.
-
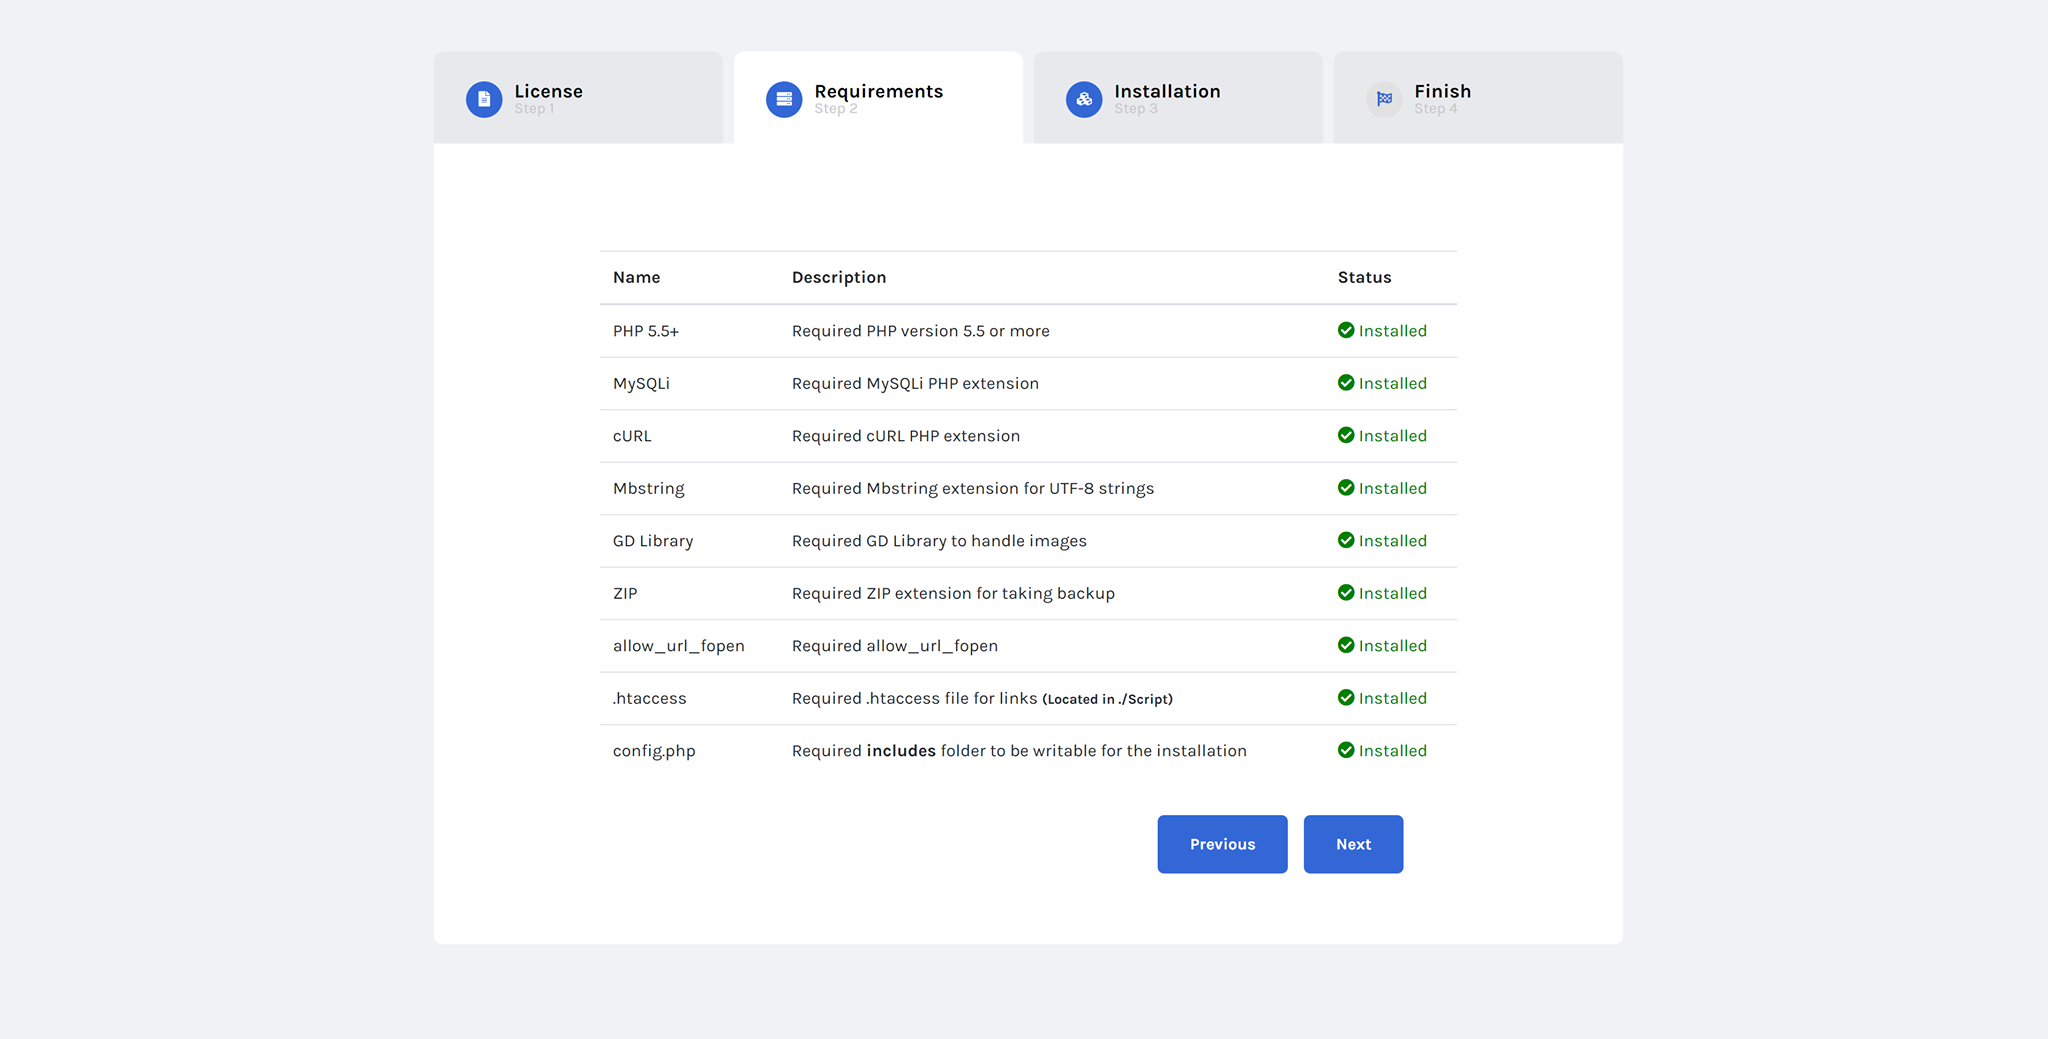
Extensions: Ensure the following PHP extensions are enabled:
mysqli(for database interaction)mbstring(for multibyte character handling)curl(for API calls and integrations)GD Library(for image processing)fileinfo(for handling MIME types)
-
Disk Space: Minimum 50MB for installation, but allocate more for media uploads.
-
SSL Certificate: Mandatory for enabling secure HTTPS connections.
b. Tools You’ll Need
- FTP Client: For uploading files (e.g., FileZilla).
- Database Management Tool: phpMyAdmin or MySQL Workbench.
- Text Editor: VS Code, Sublime Text, or Notepad++ to edit configuration files.
- Browser: Chrome or Firefox for accessing the setup wizard.
3. Downloading Sngine
After purchasing Sngine from Codecanyon, download the zip file containing the script. Unzip the package, and you’ll find the following folders:
- Documentation: Guides to help you understand the setup process.
- Script: This is the folder you will upload to your server.
- SQL: Contains the database schema for Sngine.
Keep the purchase code from Codecanyon handy, as you’ll need it during the installation.
4. Preparing Your Server
A well-prepared server ensures a hassle-free installation. Follow these steps:
a. Set Up Hosting
Choose hosting suitable for social networking websites. If you’re unsure, here are some options:
- Shared Hosting: Ideal for testing or small communities.
- VPS Hosting: Recommended for mid-sized platforms.
- Dedicated Server: Best for large-scale networks.
b. Create a Database
- Log in to your hosting control panel (e.g., cPanel).
- Navigate to MySQL Databases and create:
- A new database.
- A user with a strong password.
- Assign all privileges to the user for the database.
c. Configure File Permissions
Set the following folders to 777 (read, write, and execute permissions):
/content/uploads//content/themes/default/templates_compiled/
These permissions ensure that Sngine can save uploads and compile templates.
5. Uploading Sngine Files
Step-by-Step Process
- Connect to your server using an FTP client (e.g., FileZilla).
- Upload the contents of the Script folder to your server’s root directory or a subdirectory (e.g.,
/public_html/). - Double-check that all files are uploaded without errors.
6. Running the Installation Wizard
The installation wizard simplifies the setup process. Here’s how to proceed:
a. Access the Wizard
- Open your browser and visit:
http://yourdomain.com/path_to_script/install
b. Fill Out the Form
The wizard will prompt you for the following details:
- Database Host: Usually
localhost. - Database Name: The one you created earlier.
- Database User and Password: Enter credentials assigned to the database.
- Admin Details: Set up the admin email and password for your website.
c. Verify Purchase Code
Enter the purchase code from Codecanyon to proceed.
d. Complete Installation
Click "Install" and wait for the process to complete. If successful, you’ll be redirected to your site’s homepage.
7. Post-Installation Tweaks
After installation, perform these essential tasks:
a. Secure Your Website
- Enable SSL and redirect all HTTP traffic to HTTPS.
- Reset permissions for sensitive folders to
755.
b. Configure Settings
- Log in to the admin panel and customize:
- Site Name and Logo: Go to Settings > General.
- Default Language: Add translations if needed.
- Email Configuration: Set up SMTP for sending emails.
c. Test the Functionality
- Create a test user account.
- Post updates, create groups, and test media uploads.
8. Troubleshooting Common Issues
a. Database Connection Errors
Ensure database credentials are correct, and the MySQL service is running.
b. File Upload Errors
Check that the /content/uploads/ folder has the correct permissions.
c. Slow Performance
- Optimize images before uploading.
- Use caching plugins or a CDN.
9. Preparing for Launch
Launching your Sngine website requires attention to detail. Follow this checklist:
- Test all features, including user registration and group functionality.
- Announce your launch on social media.
- Set up analytics to track user engagement.
Conclusion
Installing Sngine may seem technical, but with this detailed guide, you’ll be up and running in no time. Whether you’re building a community for a niche interest or launching a full-scale social network, Sngine provides the tools you need to succeed.
- Vamos Começar
- Customization and Themes
- Plugins and Extensions
- SEO and Marketing
- Web Hosting and Performance
- Monetization and Business
- Community Building
- E-commerce and Marketplace
- Security and Privacy
- Development and Coding
- Bug Reports and Fixes
- Hosting Reviews
- Success Stories
- FAQs and Guides
- Feature Requests
- Social Media Integration
- Event Management
- Analytics and Reporting
- Collaborative Projects
- Sngine Updates and News
- Theater
- Wellness


